Remote visualisation portal: FastX#
v3.2.8 - beta - Access here
Liger can be used for scientific remote visualisation in order to exploit the supercomputer's GPUs, storage and processing power to for fast rendering and visualisation jobs.
The access point for managing visualisation sessions is the FastX portal.
It can be used for:
- Running supported graphical applications: Matlab, Abaqus, VisIt, etc. Access the portal for a complete list
- Graphical file transfer and remote file management
For Jupyter sessions, go here
Usage guide#
Full FastX user guide can be found on the official website under Client Guide: https://www.starnet.com/xwin32kb/fastx-3-2/. A summary of the features on Liger is reported here.
Access#
FastX can be accessed via a browser or through the FastX Desktop application that can be installed on your computer.
Web browser#
- Visit the portal page: https://liger.ec-nantes.fr:25900
- Enter your Liger credentials
Desktop application#
- Install the FastX client for your OS here: https://www.starnet.com/download/fastx-client
- Click on "Open connections" - "+" sign to create a new connection
- Select the https options
- Enter the following - host: liger.ec-nantes.fr, port: 25900, User: your Liger username.
- Click OK and double click on the newly created connection to access the portal
Desktop client has a higher graphical quality than the web session, but less options and no File manager. Use what you prefer, or both.
Application session#
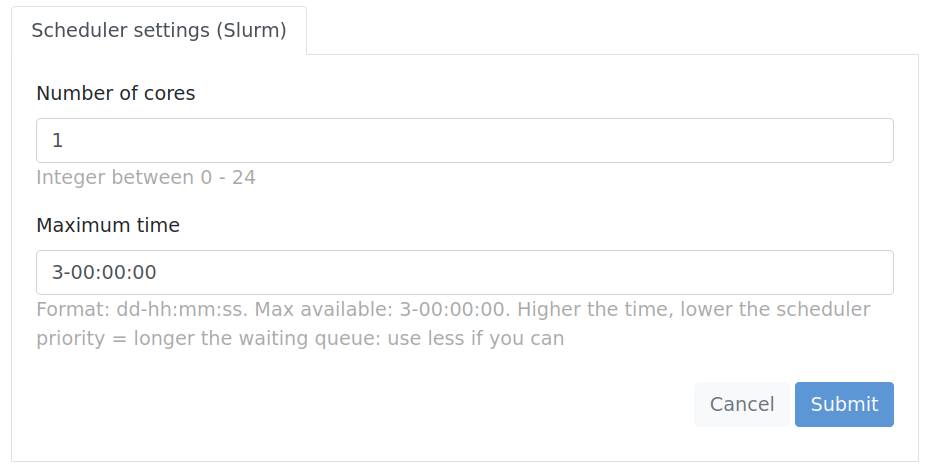
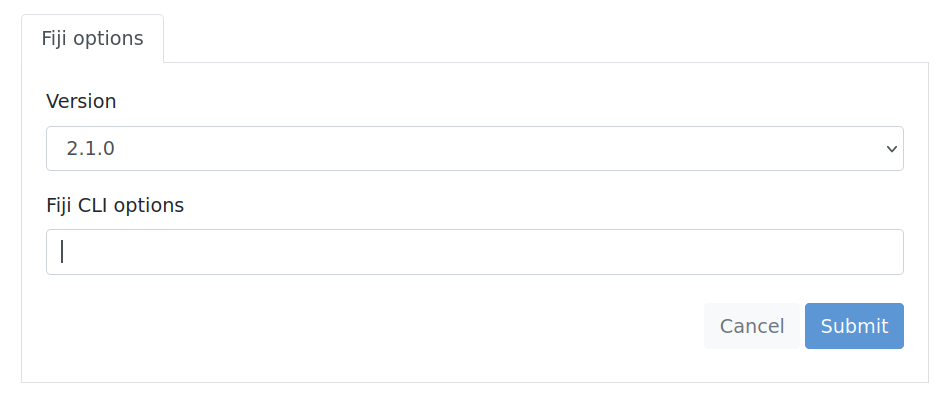
The main feature of the visualisation portal is to run scientific apps for rendering. Once you are logged in, it is sufficient to click on the + Icon and double click on the desired application. A 2 of forms will appear subsequently to allow you to set settings for your applications.
Scheduler form:

Allows you to set Slurm scheduler number of cores and time. Not respecting limits will cause your session to fail.
Options form:

Options specific to the application. Usually application version and additional command line arguments for the executable, such as flag and options to customise the execution.
If the job is submitted successfully, an output window saying "Submitted batch job xxxxxx" will appear. This means that Slurm has allocated the requested amount of CPU cores in one of the free visualisation nodes. If there's no free space, the session will hang until another job terminates. As usual, you can check the status of the submission from Liger command line with the commands Mysqueue and sinfo.
The application log file to debug application errors can be found in your $SCRATCHDIR (/scratch/username/), with the format: visu-xxxxxx.txt, where xxxxxx is the job ID. This file can be easily viewed from the portal File transfer or via ssh, navigating to your respective SCRATCH.
Please include that file when sending a support request
Once your job is submitted, a small terminal icon should appear in the main session view. Click on "play" to start the session in another window, "x" to terminate.
Session management#
During a session, it is possible to modify some of its settings.
- From the web session: a tiny dropdown window should appear when you hover the top center of your browsew view. Choose the home icon to go back to the main portal. keyboard icon to change the input of your keyboard. folder icon to open File Manager. gear icon to change the settings of visualisation, in particular to increase speed or quality of the session.
- From the Desktop client: in the connection view, click on the top left user icon on your running session icon. Then click settings on the dropdown menu. Option will be limited cpmpared to the web browser alternative. No file transfer is available from the client.
File transfer#
FastX gives the possibility to transfer files between your computer and Liger via a graphical interface. This option is only available from the web browser portal.
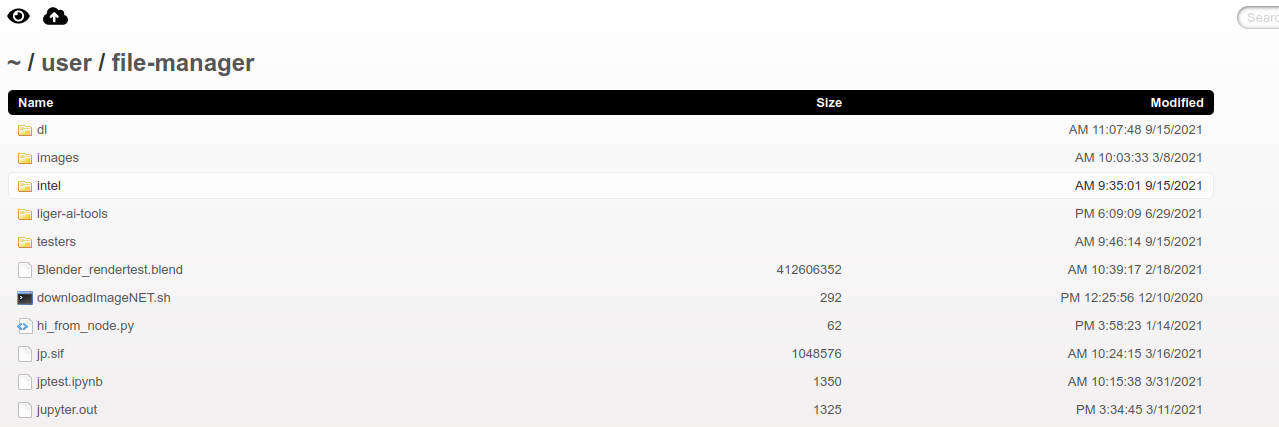
Click on your username -> File Manager on the top right in your browser window. The following view should open in a new window:

The default folder is your SCRATCH directory (/scratch/username/). Use the top left buttons to respectively toggle hidden files visibility and upload file from your laptop